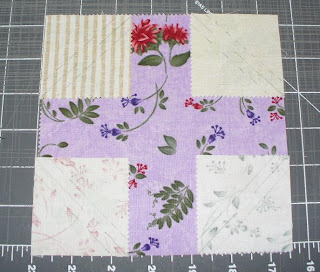
CUTTING THE LAYER CAKE
Here's how I'm cutting my layer cake for the project. Remember, you don't need to use a layer cake. Regina is using fat quarters. I'll be adding some scraps from my stash for additional interest.
The first thing I did was separate my lights from my mediums and darks. For my blocks I decided I want to use the lightest fabrics only on the corners in the snowballs. My mediums and darks will be used in the snowball blocks as well as the nine-patches.
Now it's time to start cutting. I decided to cut from my mediums and darks first. I layered four fabrics on top of one another. The first cut is a 6.5" strip.
Move that strip aside. Now cut a 2.5" strip.
From the 6.5" strip, cut a 6.5" square. From the remainder of that strip, cut 2.5" squares. Take your 2.5" strip and divide into 2.5" squares.
Each piece of the layer cake will yield ONE (1) 6.5" square and SIX (6) 2.5" squares.
Now let's cut from the lights. I used June Tailor's strip cutter for this part.
Each piece of layer cake will yield SIXTEEN (16) 2.5" squares. Again, I like to cut through four layers at once.
Whew!! All that cutting. It must be time for a cookie break.

Hmmm. I hope there's some chocolate chunk or snickerdoodles in there!

Oh, now that's a dirty trick. I've heard of high fiber treats, but this is ridiculous!
SNOWBALL BLOCKS
Yes, I do silly things to make my quilting process even more fun. Since I want this to be a scrappy quilt, but since everything is from the same line and I know it will work together, I decided to mix up all those light squares in the cookie jar. Now without peeking, I'm going to pick four. These will become the four corners of my snowball block.
And here they are! Now get your mechanical pencil ready.
Turn each square over. I like to use this little tool. Align the center with the diagonal center of the block. Using your mechanical pencil, draw a line down the middle and also on either side of the tool. It's a perfect 1/4". You're only going to use two of those lines, but I find it's easier for me to just draw than it is to align the squares afterwards. That's just me.
Do the same thing with the other light squares.
Now pick a 6.5" square from your stack. Right sides together, put a light 2.5" square onto each corner of the 6.5" square.
You're going to sew on TWO (2) lines in each of those squares. Sew down the center line and the line nearest the corner. Do that on all four corners.
Press open. I like to press open before I cut anything because it adds stability to the block. This is what it looks like.
Now it's time to trim off those waste triangles. Open up one of the corners and carefully cut between the two sewn lines.
Do this on all four corners. Press your block again, pressing seams away from the snowball.
You'll now have four darling 2" blocks. Press toward the darker color. Trim off the dog ears. This is what you have.
By taking the extra time to sew an additional line, you've added to your available blocks. As Bonnie Hunter likes to remind us, the fabric that we throw away cost just as much as the yardage we use. Get as much out of it as you can!
NINE-PATCH BLOCKS
Simply take your 2.5 squares and sew together three across. Join so that you have three rows. Make sure to use a scant 1/4" seam or else your blocks won't be 6.5". You want them to be the same size as the snowball blocks.
The main thing about this quilt-along is to use what you already have and make it fun!
Hugs and purrs,
Pi and Momcat


 Quilter Blogs & Store Search
6 comments:
Love these colors. Can't wait to see it come together!
Those fabrics are beautiful! This is already fun! Glad so many are joining us, too. I've spent the day cutting up scraps into usable pieces. I'll be ready to sew my brains out soon.
Silly me. When you said you were using Layer Cakes, I started thinking you might be making snowballs of a different size. Makes sense now. But I do love your tutorial very much.
I'm looking forward to making a snowball quilt with you, Regina and hopefully others too. My first e:sew-cial! Such fun!
SewCalGal
www.sewcalgal.blogspot.com
Great tutorial. I'm in, I'm in! I've decided to use my pansy fabrics that I was holding hostage.
Darlene...e:sew-cial!! I've never heard that term before but it's absolutely perfect for this little project!
Excellent tutorial!
Post a Comment